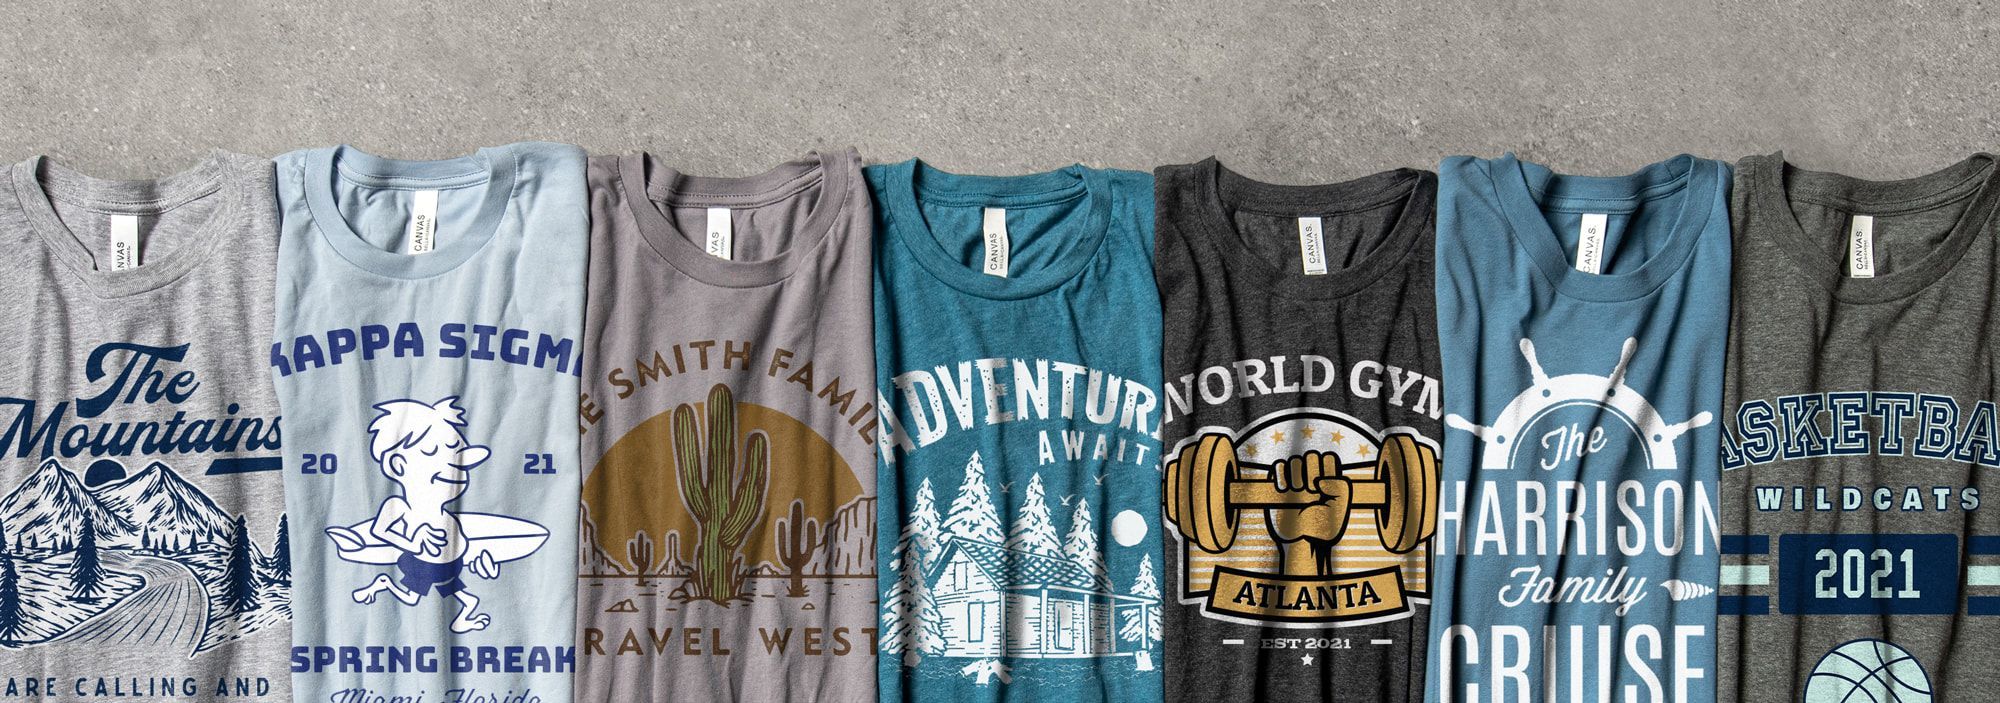

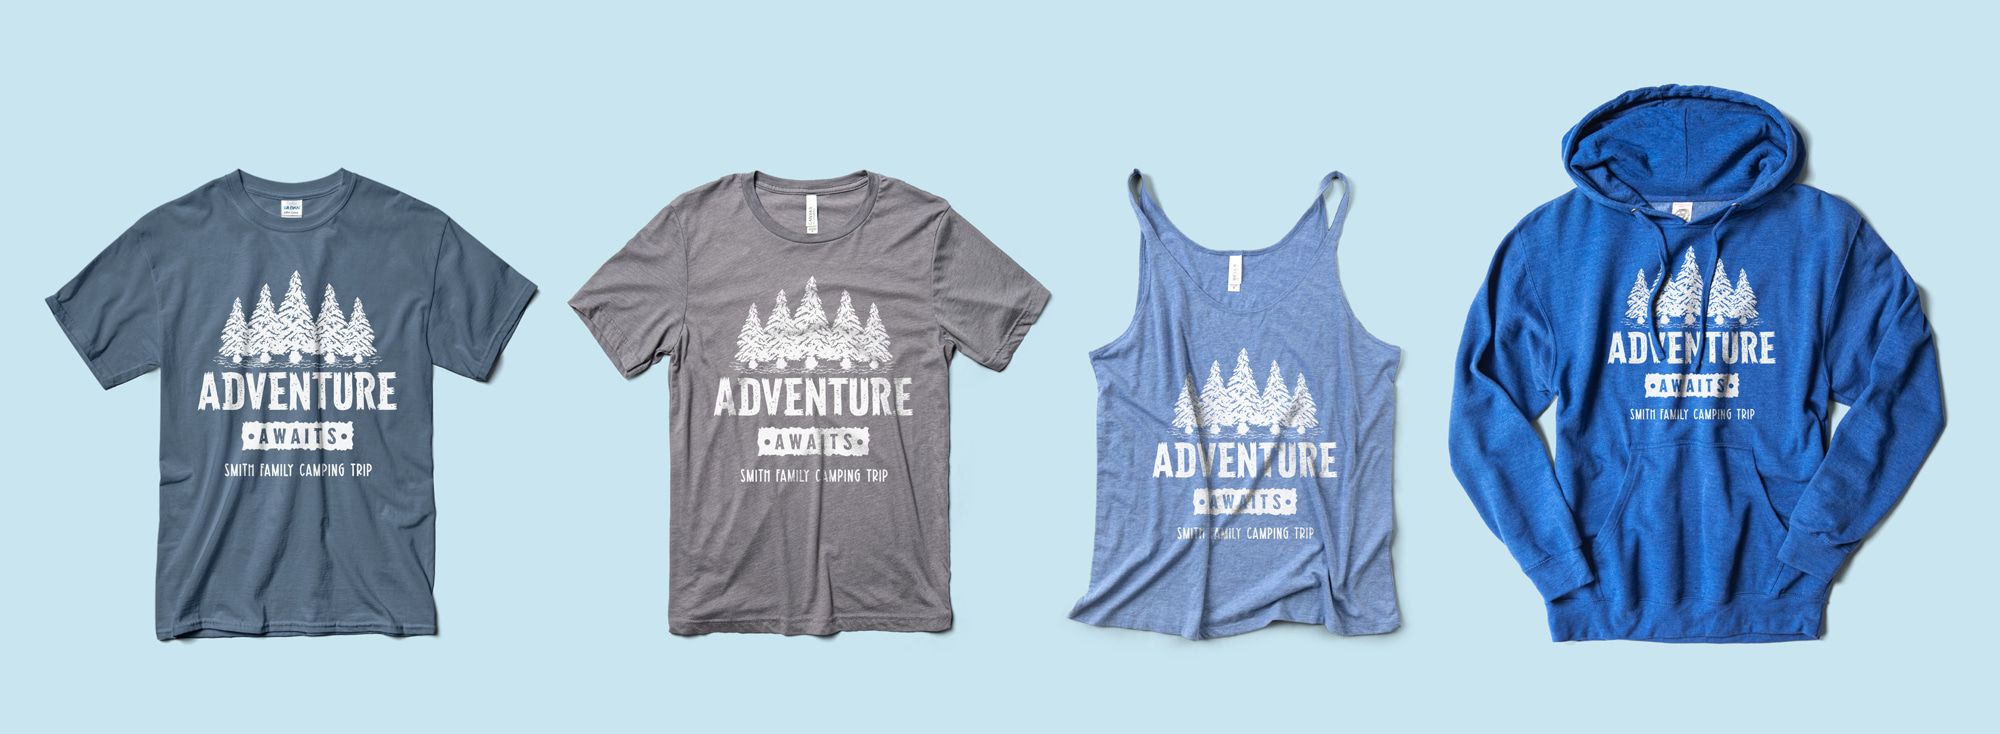
We’ve spent quite a while developing a catalog of t-shirt design templates that encompasses a huge range of different uses and topics. And it’s not only important to cover lots of categories, but the designs themselves need to be on par with the professionally made ones that you’d expect from a modern-looking business or organization. As design trends update and change, we work to do the same in our catalog so that you can design a shirt — or get inspiration for a new t-shirt design idea — that just looks awesome.
We’ve worked with many extremely talented designers to make all of these unique templates that you won’t find anywhere else. What makes them unique is that they’re entirely constructed of individual elements from our clip art library so that they’re as flexible and customizable as possible. And with as many categories as we’ve covered so far, there’s surely something there to help you get started and make designing easier.
I’m going to first give you the basic rundown on how to use our t-shirt design templates. Then I’ll show you a few easy ways you can make the most of them so that you can design smarter and take your look to the next level.
Check out the video below for a super quick tutorial:
Getting started with design templates
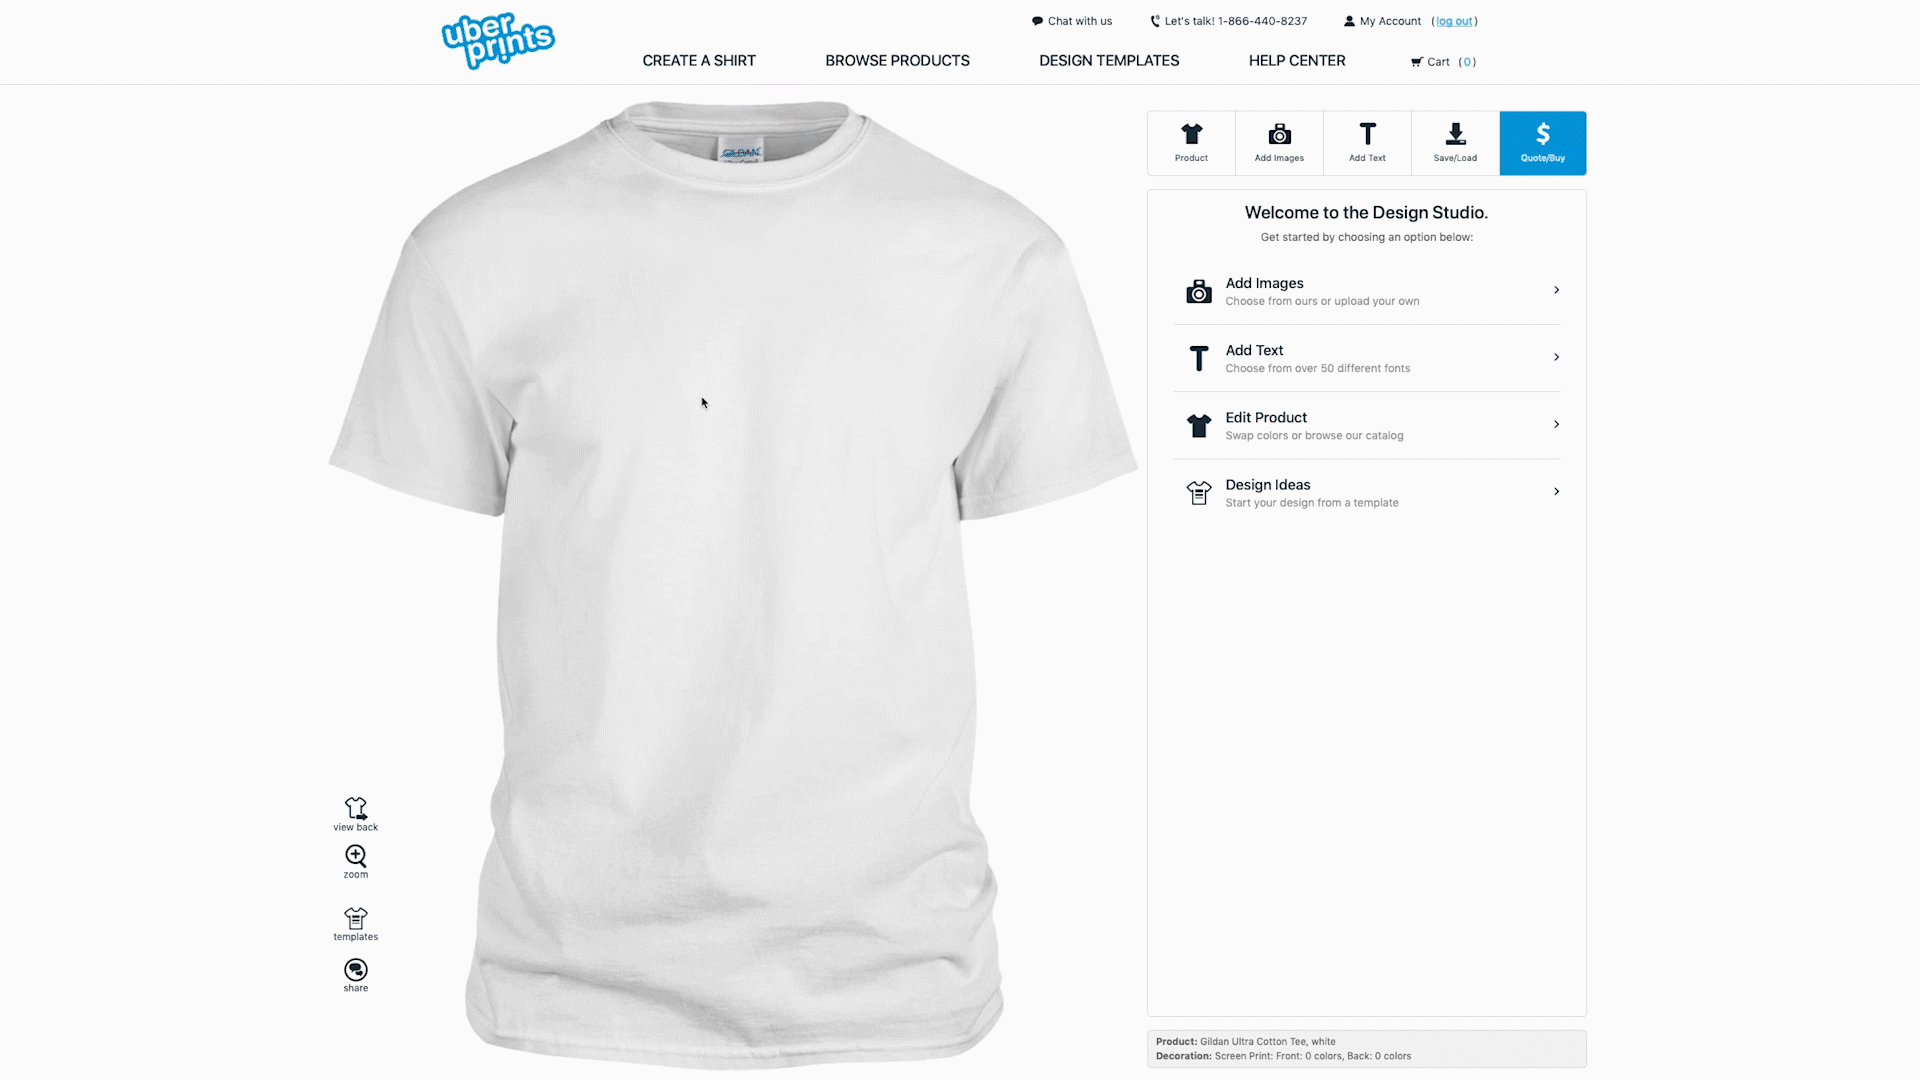
You can take a look through all of our categories and sub-categories from the homepage or from the “Design Ideas” section in our Design Studio. If you want to get some t-shirt design ideas, make sure to click into different categories to see the variety of more specific topics there are to choose from.
Seriously, there’s a lot there. Just in the Occupations category, we have tons of more specific businesses like everything from Landscaping and Construction, to Restaurants and Breweries.
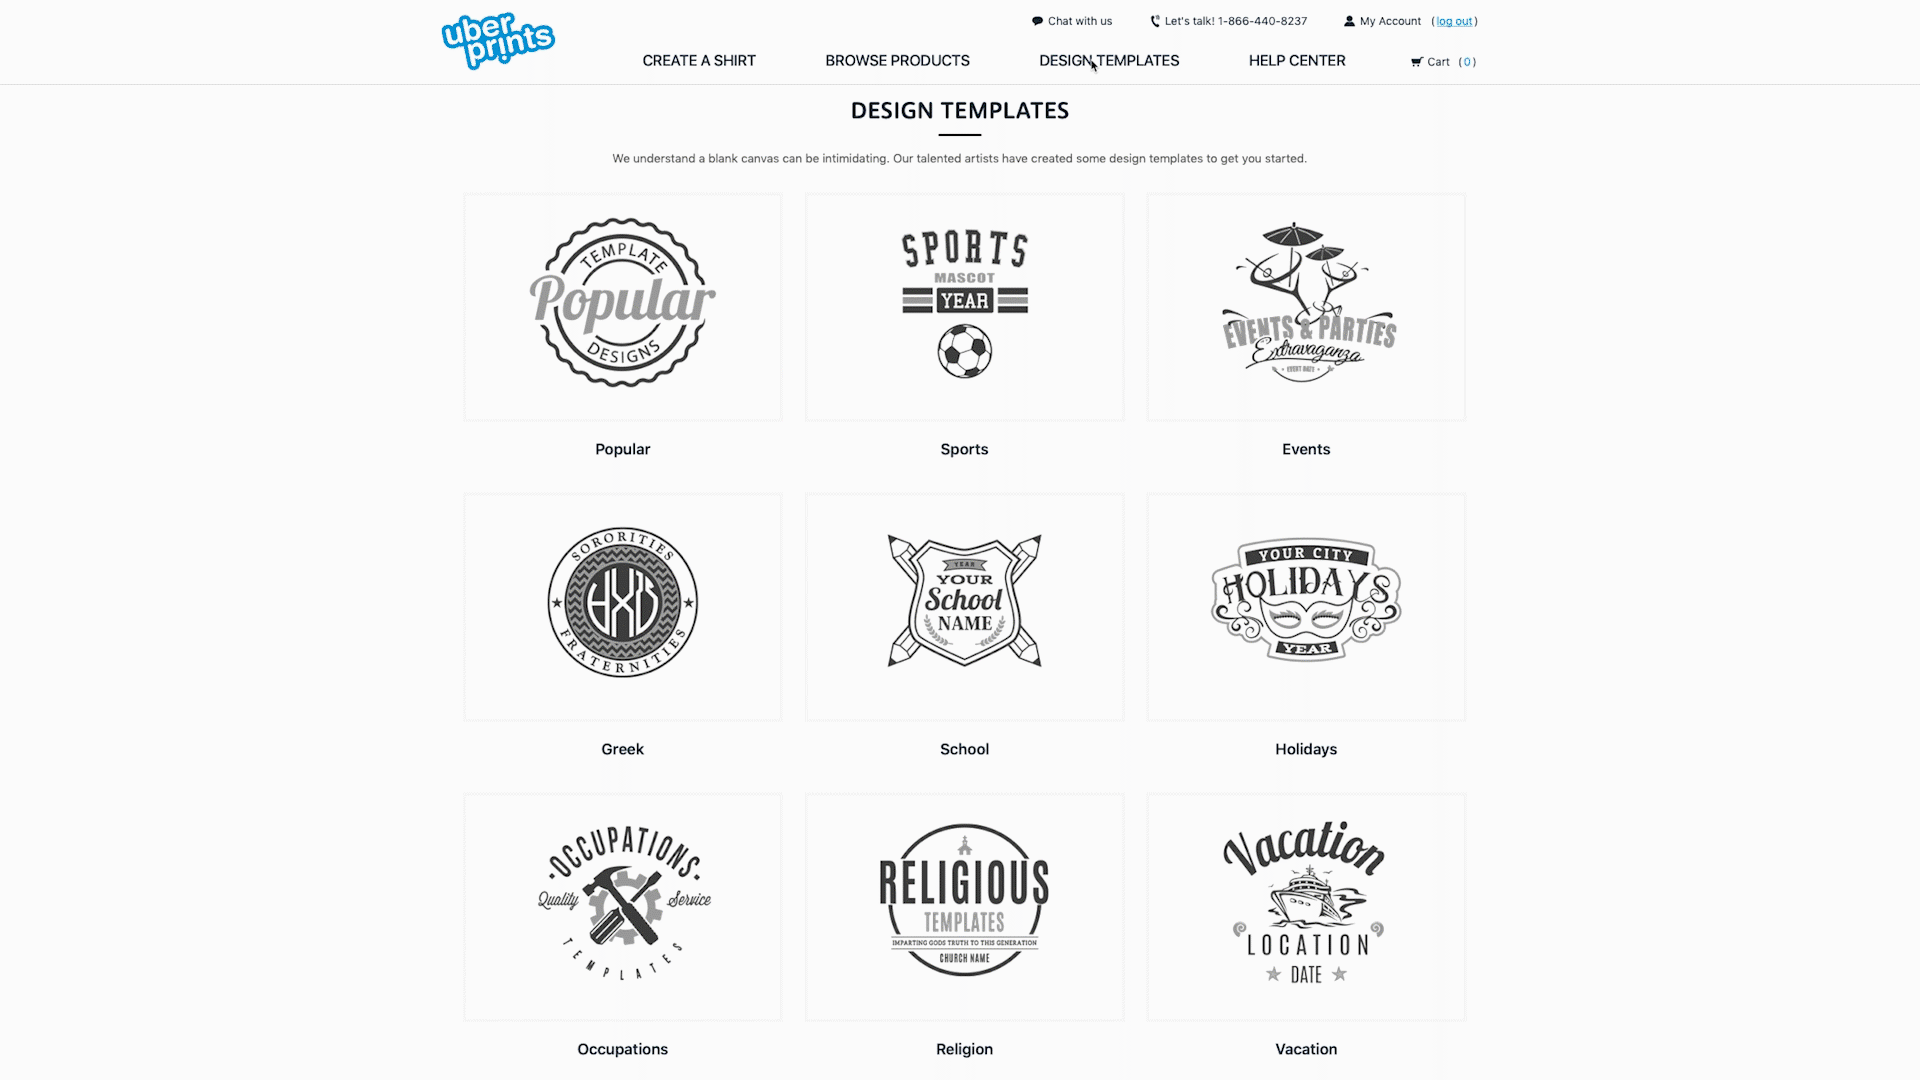
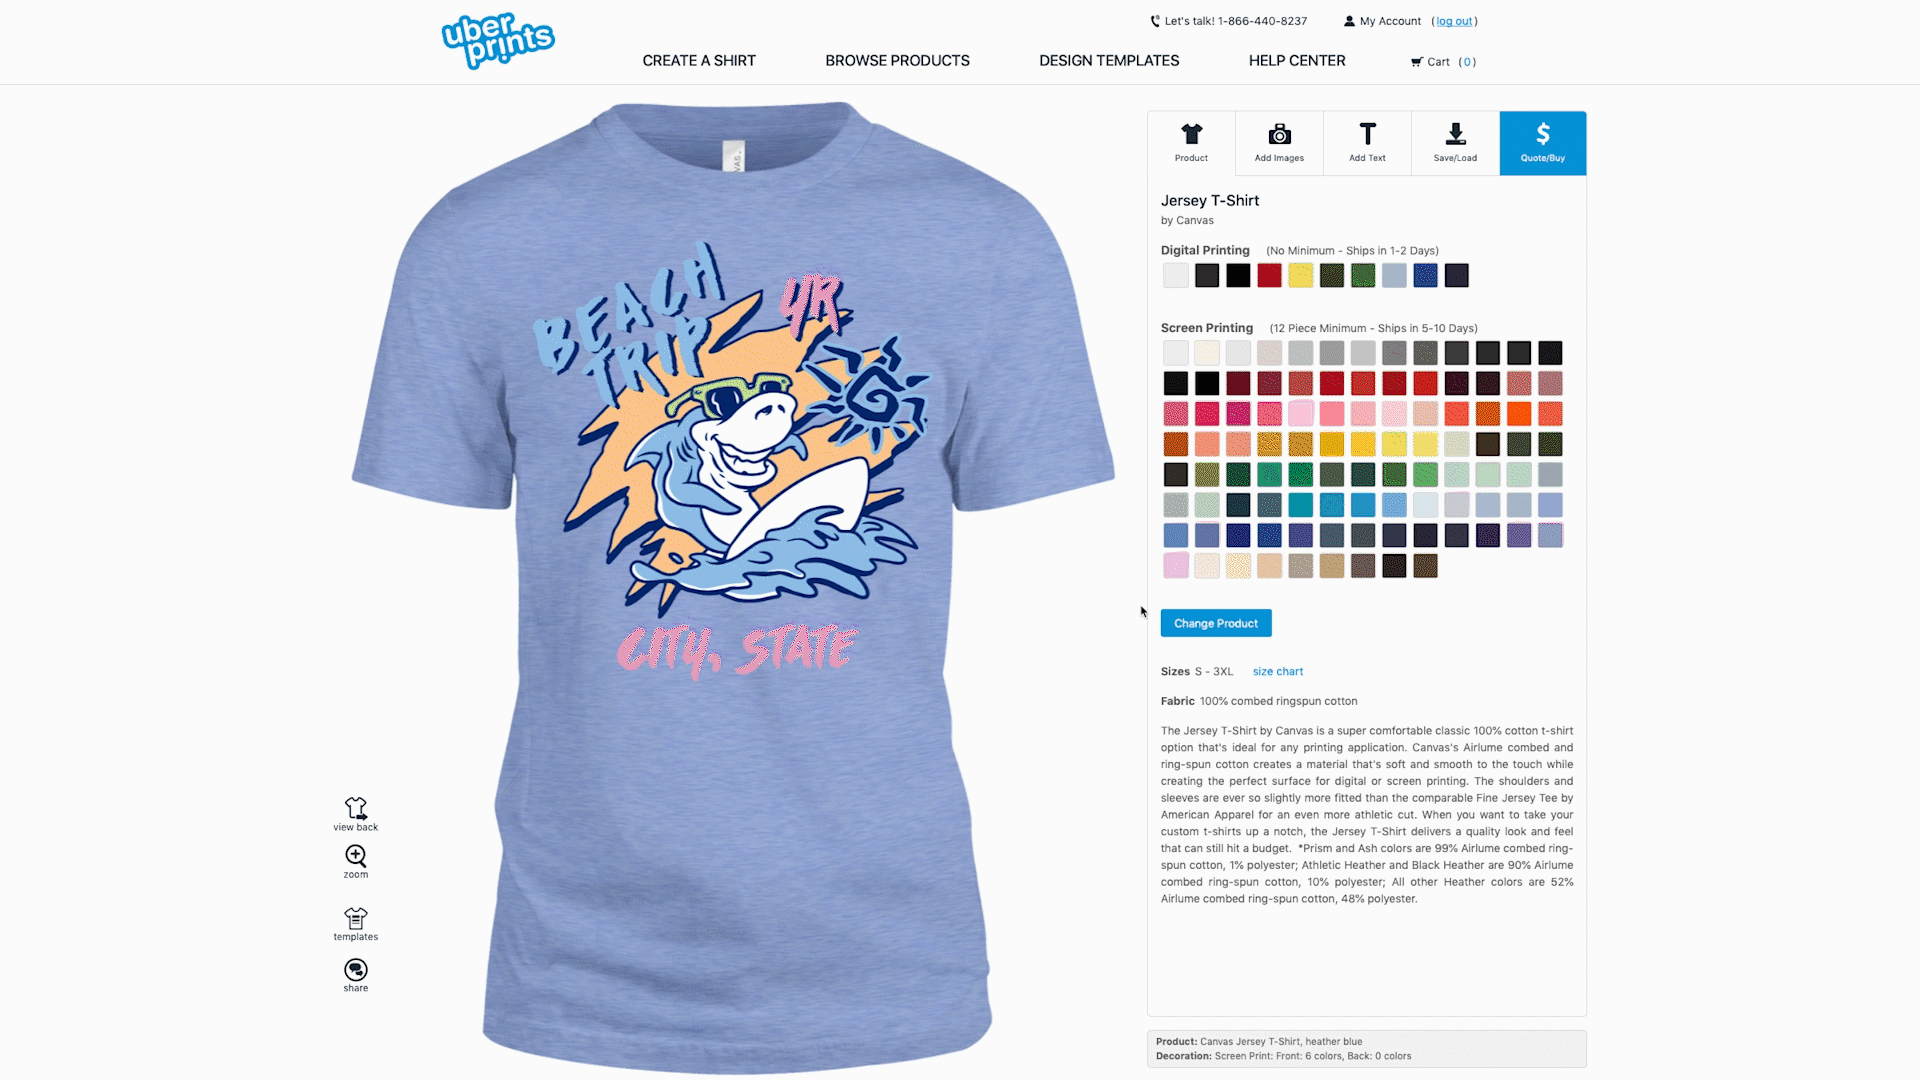
Clicking on one will immediately load it into the Design Studio where you can start making it your own. The templates will load both the design and a matching t-shirt that goes with it. But you should really think about this as just a starting point — a suggestion for a look and color palette to get you going and you’re free to use as much or as little of it as you’d like to create your final design.
To see how you can play around with all the different options and details, check out our other tutorials on how to add and customize images and text which works exactly the same whether you’re using a template or starting from scratch.
Whenever you’re ready, you can save your design for later or go ahead and add it to your shopping cart from right inside the Design Studio.
Tips on how to design smarter
While using the design templates to get you started is already a useful tip, there are definitely some things to keep in mind that could help your designs look better and maybe even save you some money.
Use the templates just as the foundation for your design
When you’re picking out a template to get started, don’t get caught up in the colors, fonts, size, placement — all the things you’ll have the freedom to change once you’re editing it in the Design Studio.
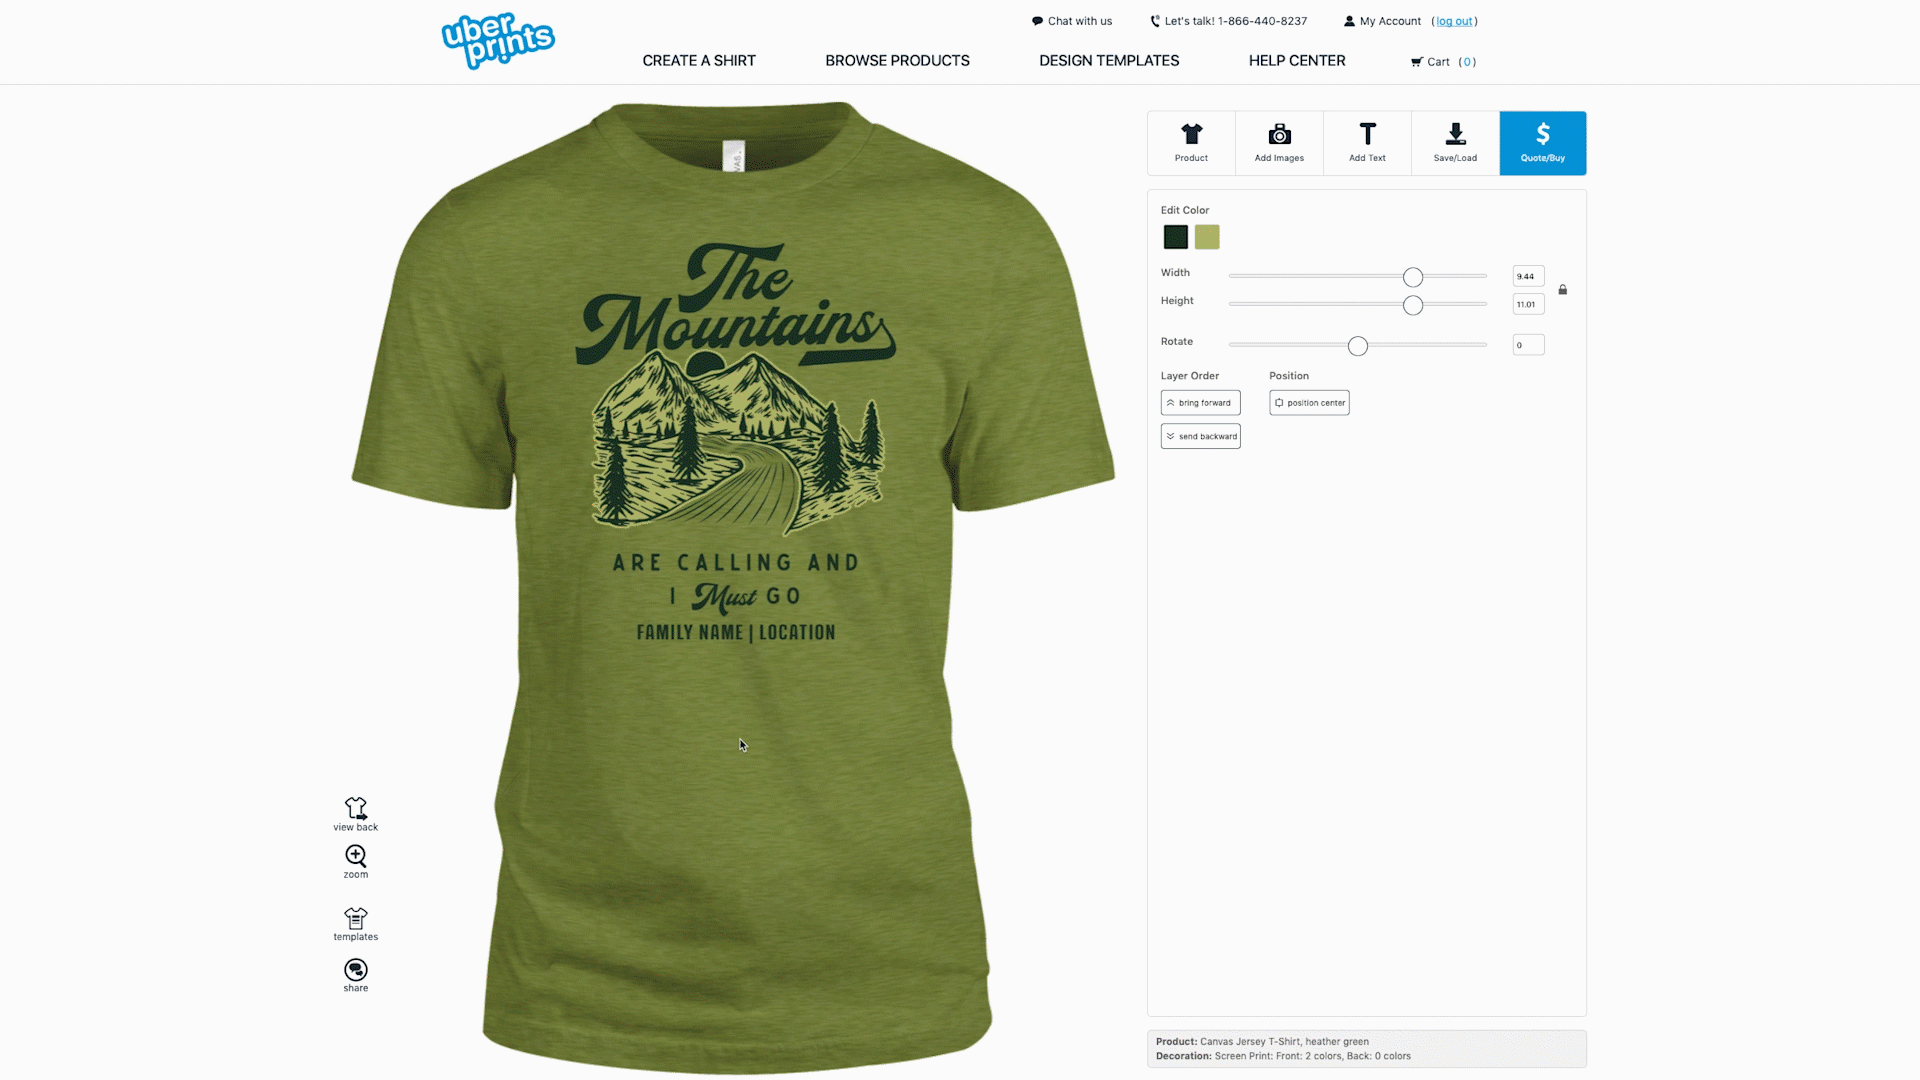
You can really take the templates in your own unique direction that might look nothing like what you started with. It’s just often more helpful to start with a design that’s already been fleshed out and edit from there than to stare at a blank canvas. You can come up with arrangements and styles that you may have never thought of otherwise and it’ll make designing easier and give you an introduction to playing with the different elements and tools you have to work with.
Upload your own image
The template you start with is made entirely of pieces from our clip art library, but you can absolutely upload your own image from within the Design Studio and incorporate it as well.
One important thing to know is that you can have your uploaded image match the colors of the rest of the elements in the template. Either select the matching colors when you upload it (you’ll be prompted with a palette of colors to choose from) or leave a note for us when you save your design that you’d like the rest of the template matched to your uploaded image. Our art department will then make these updates when your order is processed.
There are ways you can reduce your order cost
Like I mentioned before, loading a design template will get you started with colors and elements and also pair it with a matching t-shirt as well. But because you can edit all these things, the price you start with doesn’t have to stay the same either. Let me explain.
First, the most significant cost factor that contributes to the price of your order will be the apparel option you go with. There are a lot of different options to choose from in our apparel catalog and they range from really cheap to premium, and from hoodie to tank top. Swapping out what you have for a more cost-effective option will be the quickest way to drop your cost.
Second, reducing the number of colors in your design might be another great way to get more bang for your buck. If you select to have your order screen printed — typically because you’re ordering 12 or more — the number of colors in your design is used to calculate the total cost of your order. Even if the design template that you start with originally has 3, 4, or 5 colors, you can edit the different elements to change colors and reduce that total number and you’ll see a big difference in your quote when you head to checkout.
Take a look at this article on saving money on your order for more details on this topic.
Edit and move multiple design elements at the same time
A nice little feature of the Design Studio is that you can click and drag over multiple design elements — even the entire design — to edit them all at the same time.
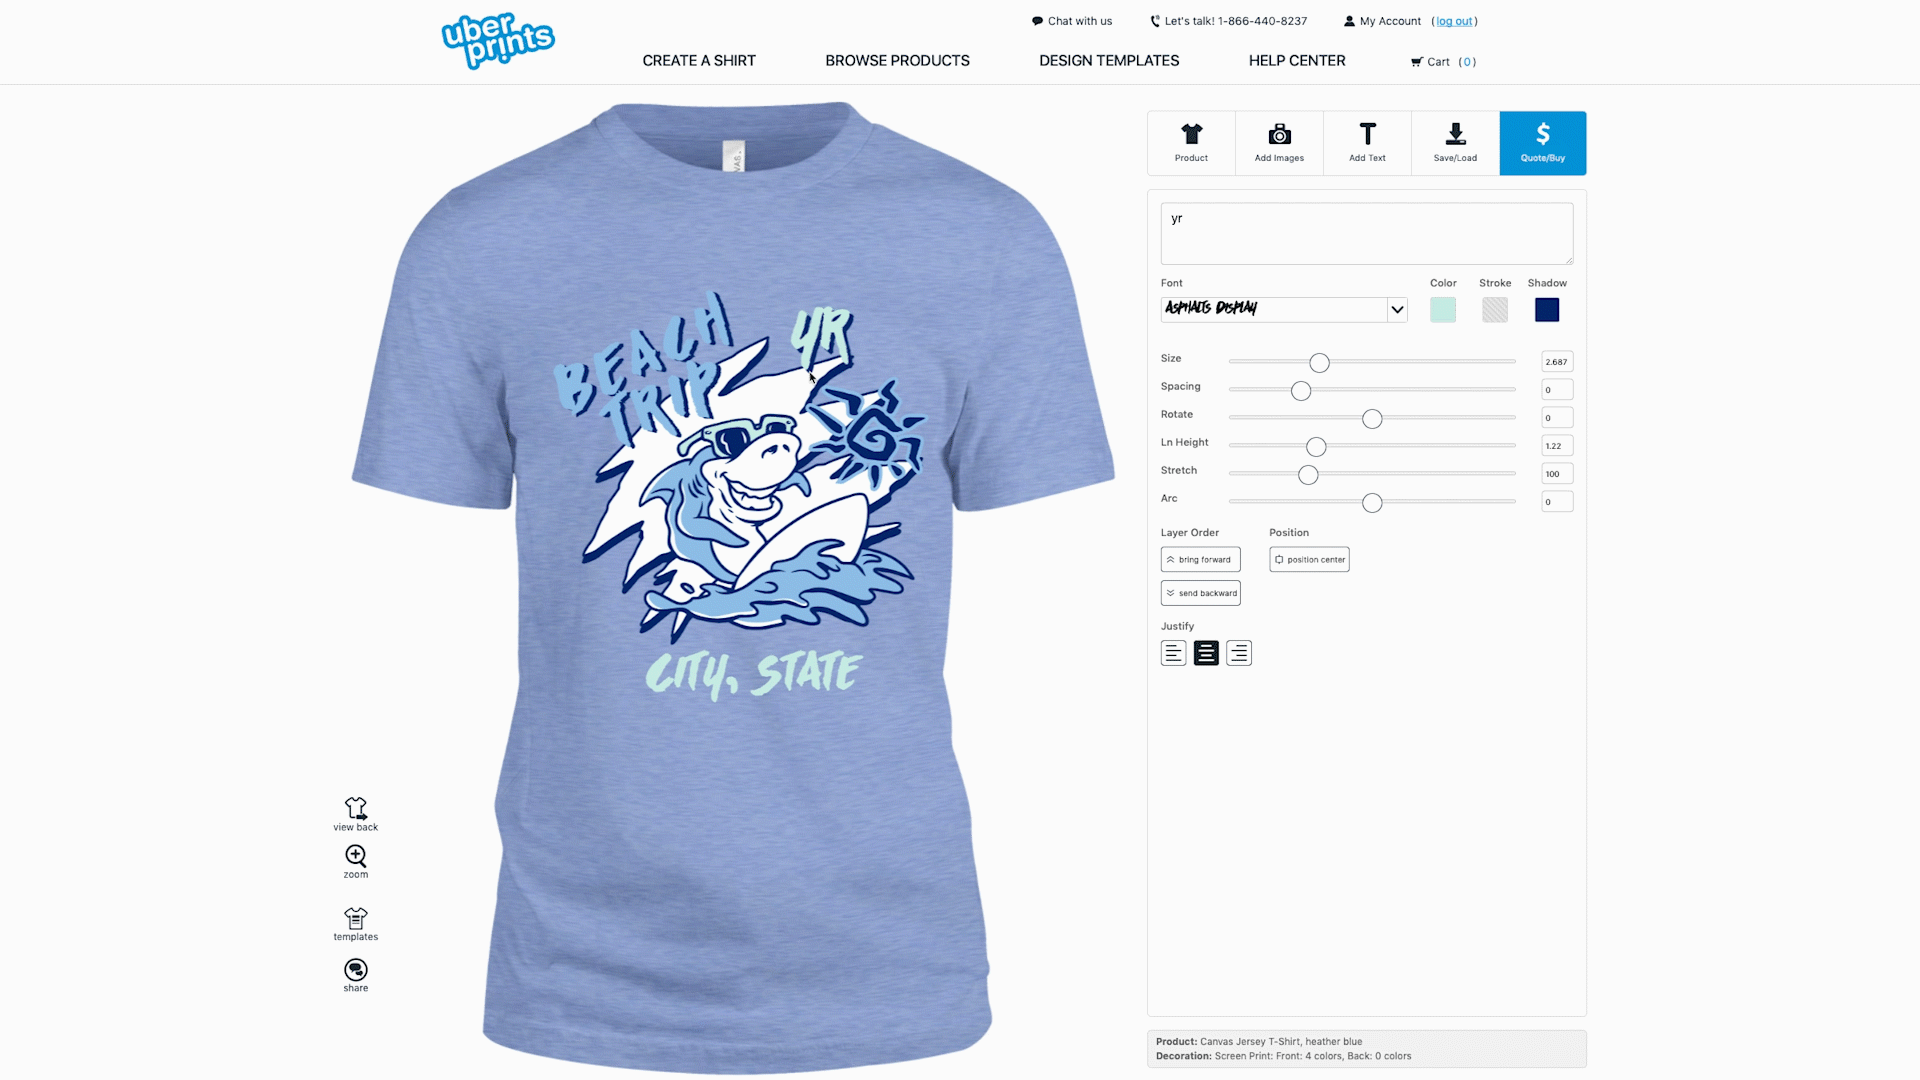
This will of course let you resize and move around a group of elements together, but you can copy and paste them in a group as well. Right-clicking on your selected objects will pull up a small menu where you can copy, cut, or paste them. This is handy to either make a quick duplicate or to move your design to the other side of your shirt if you’d rather use it on the back.
Design templates are just one of your free perks
The design templates are great for helping you get started, but they also look great because they’re all high-quality vector graphics. Especially when one of the most common mistakes you can make when ordering custom t-shirts is to use poor quality images, this can be a huge saving grace that makes sure everything comes out perfect. All of these are 100% free to use and we’re always updating them and adding more.
We also offer free shipping on orders over $100, but our team also works to provide some of those behind-the-scenes free perks: each and every order is reviewed and approved by real people at multiple points in the process, our art department reviews every design and makes requested changes and improvements, there are huge bulk discounts for larger quantity orders, and our customer service team is available by phone, email, and chat 7 days a week.
I hope this has been helpful in learning how to better use our t-shirt design templates and you can absolutely let us know if you need help with templates or anything else.