
For being so common, screen printing is surprisingly foreign. And despite the internet’s best efforts, the details on how designs go from our computers to a t-shirt can be elusive at best. To those looking for a good how and why, I’ll take you through the entire screen printing process to better understand what’s important to you when ordering custom screen printed t-shirts.
Screen printing has always been the real meat and potatoes of t-shirt printing. Revered as likely the most versatile printing method, the process of printing ink through a mesh screen was first adopted for t-shirt decoration in the 1950’s. Today, it remains the most common form of t-shirt printing because of its efficiency and utility, with everyone from retail giants to your local 5k relying on it to get the job done.
To get the most out of your order, let’s look at all the steps involved, what things you should consider, and some explanations before you fork over your hard-earned cash.
The basic steps for screen printing custom t-shirts
Screen printing takes each color in a design and prints them individually through fine mesh screens. These screens are loaded into a press where ink is squeegeed through them and onto a shirt to piece the full design back together.
Here are the basic steps along the screen printing process:
- Artwork prep – Every design begins by separating colors on the computer and preparing a new document that holds necessary information for the following steps.
- Screen making – Each layer of color is taken from the computer and used to create a stencil on individual screens.
- Ink mixing – Ink is prepared by mixing the proper color along with any necessary additives for the specific application.
- Printing – Everything comes together as ink is pushed through the screen stencils and onto a t-shirt to recreate the original design.
- Clean-up – Screens are recycled, utensils and machines are cleaned, and everything is prepared to start the process over again.
We’ll take each one of these steps and dive a bit deeper to see what’s relevant when ordering your custom screen printed t-shirts and to better understand the process as a whole.
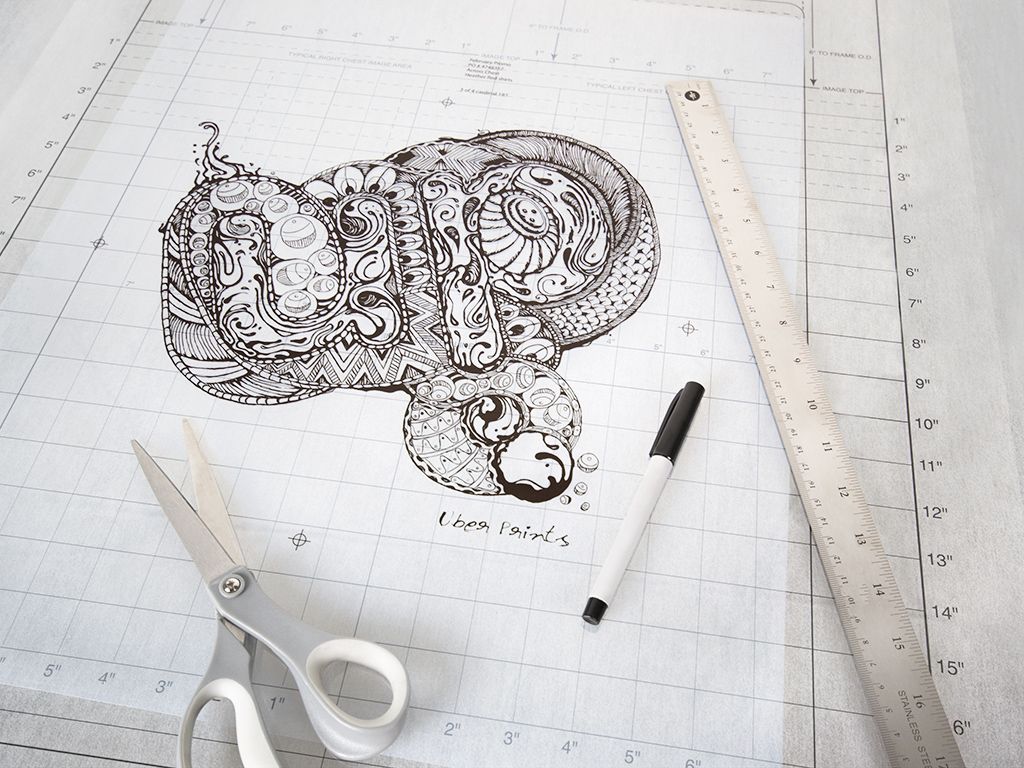
Artwork preparation
This very first step is where you set the tone for the rest of the process. Proper preparation of design files is the best way to get an order running smoothly and takes both the knowledge of your printer — and ideally — a quality image source.
Artwork and image requirements
Printers will often require higher quality images for screen printing than they do for something like digital printing. Separating the colors in a design can require quite a bit of software manipulation and will highlight any problems with your starting image. Each color needs to fit perfectly back together when printed and that can be made difficult with small, low quality image files.
So what is a quality image? The best way to define this is by looking at the two primary file types:
- Raster images – These are the more common of the two and typical file types are JPG, PNG, GIF, BMP, TIF, or PSD. Raster means that they are made up of many square pixels of different colors and we talk about quality as the number of pixels, aka resolution.
A perfect image for screen printing is around 300 pixels per inch at the size your looking to print. So for a 10” wide by 4” tall print across the chest of your t-shirt, you’re looking for an image that’s 3,000 pixels wide by 1,200 pixels tall. However, this isn’t a hard line so don’t worry too much if your image is a little smaller, just know that the further away from that ideal, the more likely print quality could suffer.
Tip: On your computer, right-click on your image file and look for “properties” and “details”. There you can usually find your image resolution.
- Vector images – Common file types are AI, EPS, PDF, and CDR. Vector means that instead of pixels, these images are made up of crisp lines called paths and angles called anchors. These are great because they allow for stretching and resizing without any loss of quality and make the preparation process simpler.
Unfortunately, vector images are harder to come by unless you’ve made them yourself or been given them by a designer. It’s also why the clip art and design templates in our design studio are all quality vector images for customers to use freely.
Separating colors
Now that we have our starting image, we need to separate out each color in the design to be printed with a single ink color through individual screens. Vector images make this step easy, while raster images need to be manipulated in software like Adobe Photoshop to cut out each portion of the image. And depending on the nature of your design, this can be more or less complicated.
The simplest way to think about color separations (often called seps in industry lingo) is with two primary categories:
- Hard-edged – These are mostly solid, bold graphics like company logos, emblems, text designs and shapes. For reference, all of the clip art we offer at UberPrints would fall into this category.
Separating these is akin to cutting out each shape and placing like colors on a layer together. Printing these designs is easier as well, and knowing what your order will cost is as simple as a visual tally of the number of colors. - Photo-like – This includes designs like elaborate rock band tees, Nascar merch depicting a car and its driver, and fully photographic images like portraits and landscapes.
Color separations for these images require a more skillful eye and rely on halftones to create gradations and smooth forms. Halftones take solid colors and break them up into smaller dots to convey tints and shades. For photo-like images, each color is halftoned and allowed to mix with others on the shirt to make secondary colors — like red blended into yellow to make orange in the middle. While it’s amazing what we can achieve with this type of printing, its difficulty makes some printers shy away from it and it’s often unclear to customers how many colors they’ll need to print their design.
File setup
Once all colors are separated from each other, a final file is prepared for production including necessary information about the order and its printing details. Usually done in a program like Adobe Illustrator and printed through an additional RIP software (raster image processor), this file will eventually be used to create clear film positives that correspond to each screen.
These few things are commonly added to files before being sent into production:
- Order numbers – Unique order numbers are typically added directly to the print file to identify all screens for a single job.
- Ink colors and print order – Each ink color used in the design is labelled, often as a Pantone color, and numbered with the order it’s intended to print.
- Registration marks – These bullseye-like icons are usually placed on four sides of the design and are used to align each color to one another.
- Print location – The location on the apparel the design is intended to print is labelled on all screens.
- Apparel information – This can include the apparel style and color that the design is being printed on.
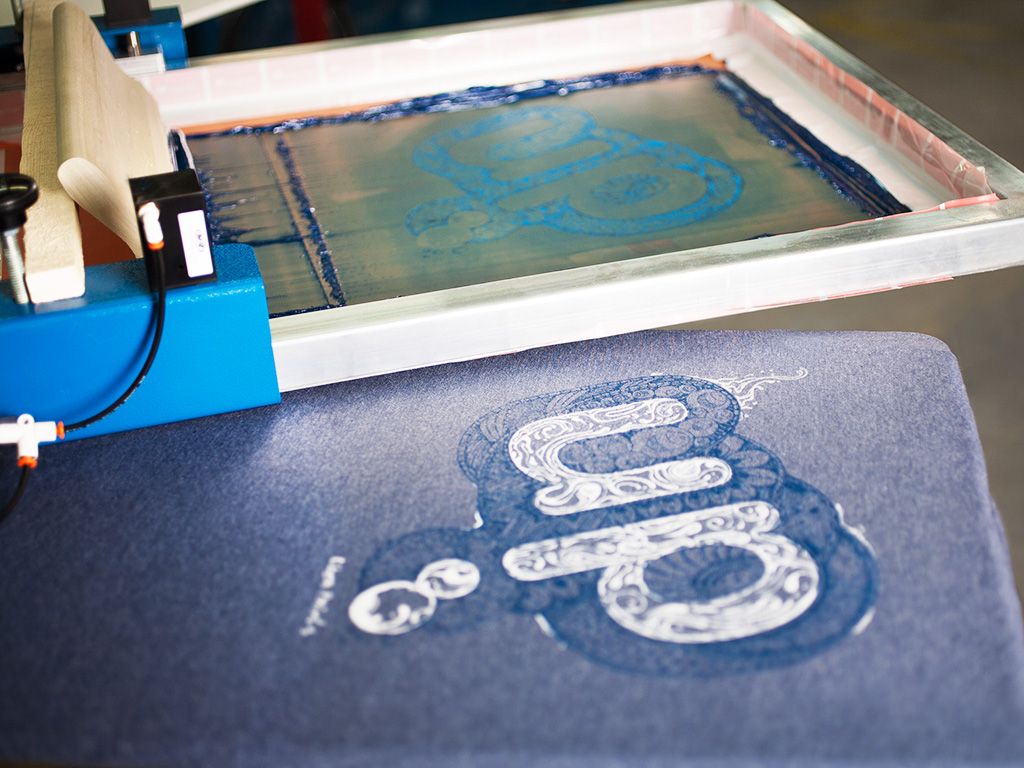
Screen-making
This part of the process refers to everything necessary to take our previously made color separations and get them onto print-ready screens.
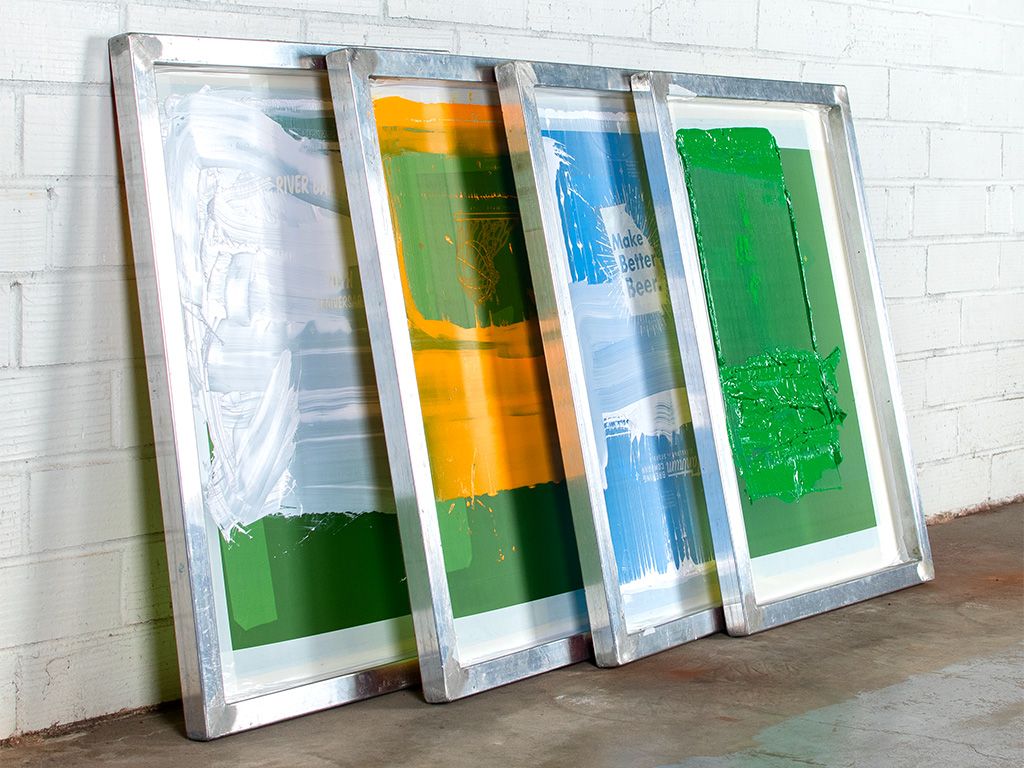
Printing film positives
After completing our final design files in the previous step, we now need to print each color layer, individually, onto clear, distinct films that include only the parts of the design that share the same color. Unlike the t-shirt itself, these films are made with an inkjet printer using only black ink to create an opaque image positive to use in our later burning process.
These films perform 2 basic functions:
- Blocking UV light – While any black ink will do, printers often use specially designed, UV blocking ink that’s uniquely opaque. As we expose the screen to UV light, unblocked areas are hardened and the better our films are at blocking the areas we don’t want to harden, the more detailed our final prints can be.
- Transfering info – The additional details we added earlier are printed directly onto the films themselves. All those details will transfer to the screens and ensure pertinent info is never separated from our designs. It’s even common to catalog films so that we can remake a screen if necessary or refer back to it after the order was printed.
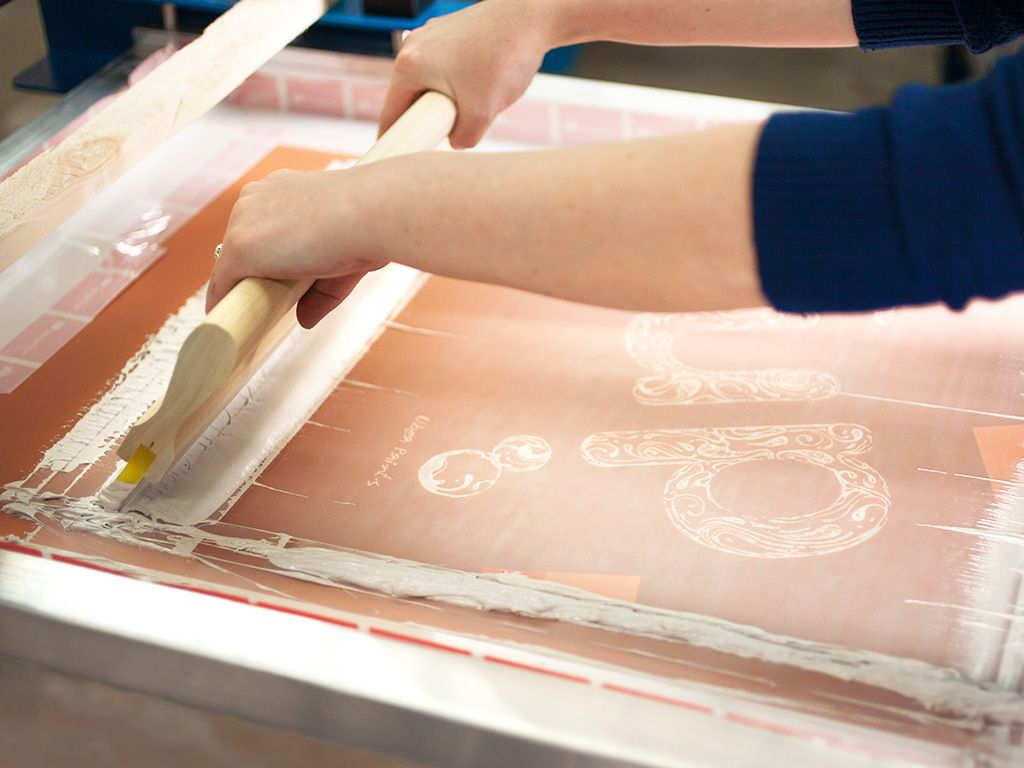
Coating screens
Screens are coated with UV-reactive emulsion using a long, hand-held trough called a scoop coater. With a similar consistency to house paint, this emulsion is what takes the porous mesh of the screen and seals it to block areas where we don’t want ink pushing through. And in the following step, its UV-reactive property will let us transfer the image on each film positive to a printable screen.
Emulsion has two primary jobs to do for the screen printing process:
- Creating detailed stencils – Using quality emulsion allows us to hold on to fine details that we can reproduce in the final print. And while this is what makes the kind of halftone printing we talked about earlier possible, there is a limit to how small these details can get — especially with multiple colors.
- Adding stencil thickness – Typically, multiple coats of emulsion are added to a screen to increase the thickness of the final stencil. This helps apply the right amount of ink and creates a barrier between the screen and the t-shirt that keeps ink from spreading where it shouldn’t.
Burning
Exposing coated screens to UV light, often called burning, will give us a hardened stencil to push ink through. On a specially designed light table, we first place the film positive and then the screen on top of that. As light shines up from underneath, the black printed areas of the film block light from reaching the emulsion while clear areas allow light through to harden it. Afterwards, the unhardened emulsion is washed away with water leaving the stencil we’ll take to the printing press.
A couple factors make sure the final stencil is detailed and crisp:
- Exposure time – Too little exposuretime will leave the emulsion fragile, while too much time will allow light to get around printed areas of the film and begin to harden areas we didn’t want it to.
- Firm contact – Screen printing light tables, called exposure units, are often equipped with a rubber lid and vacuum. This vacuum suctions the screen and film firmly against the glass top of the light table to eliminate shifting and gaps making sure we can retain as much detail as possible.
Ink mixing
Mixing the appropriate ink is a relatively short but important part of the overall screen printing process. The most common type of ink is plastisol, and when heated, turns to a durable yet flexible layer that bonds to the surface of the t-shirt. We want to have the correct color and the appropriate additives for what we’re printing.
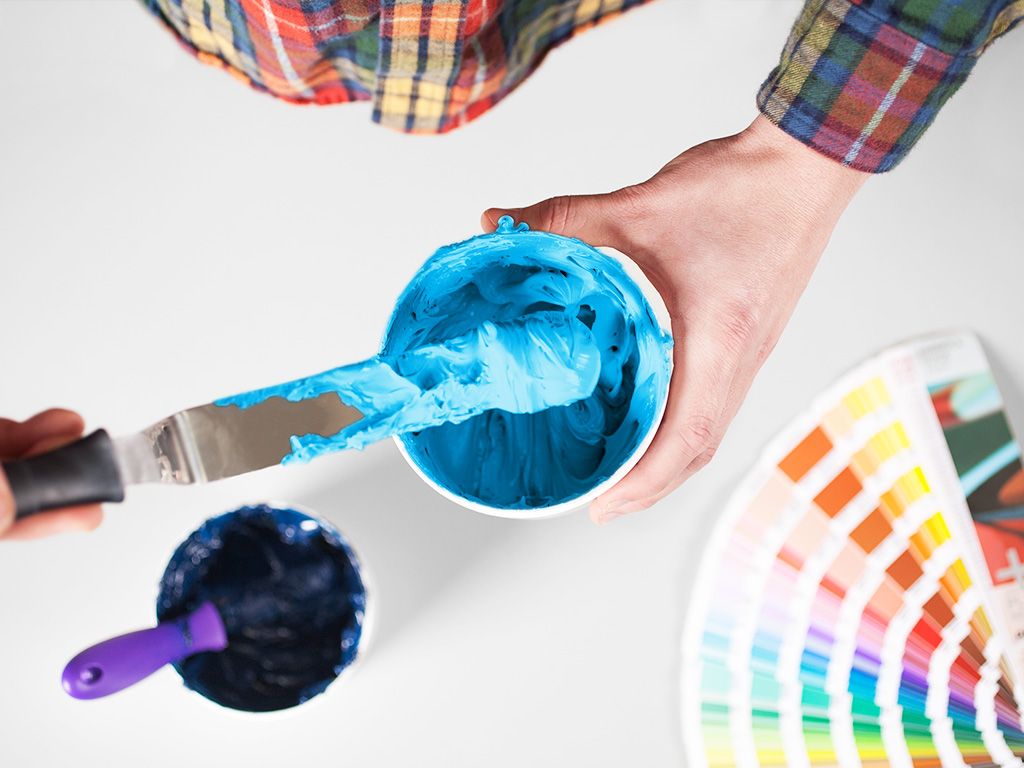
Mixing colors
Depending on the design you want printed, you may or may not need a very specific color mixed. Businesses and organizations often have particular brand colors they’ve selected from the Pantone Matching System (PMS), which is the best way to communicate colors. If this is important to you, just make sure to leave us a note with your design so we can make sure to print the color you want.
There are two basic color pallets printers use to achieve the color we want:
- Mixing systems – These consist of as many as 17 or more pigments used to create the entire range of colors. Paired with software, printers can calculate the exact proportions of each pigment necessary to mix a specified Pantone color.
- Off-the-shelf – In instances where color matching isn’t needed or offered, shops can instead use predefined, off-the-shelf colors provided by manufacturers.
Additives
Color isn’t the only thing that matters when it comes to ink. When faced with so many varieties of designs, apparel, and fabrics, printers will turn to an arsenal of ink additives to make printing easier and produce quality designs that match what their customers are looking for.
There are two primary reasons why we need ink additives:
- Printing characteristics – There are many ways to alter the properties of ink to make it better suited for a particular scenario. For instance, some change viscosity to make printing easier while others can alter an ink’s curing temperature.
- Look and texture – Some additives strictly affect the look and feel of the final product. That could be to make ink for flexible for stretchy clothing, to create a thick and raised feel, or even to make ink more translucent or soft.
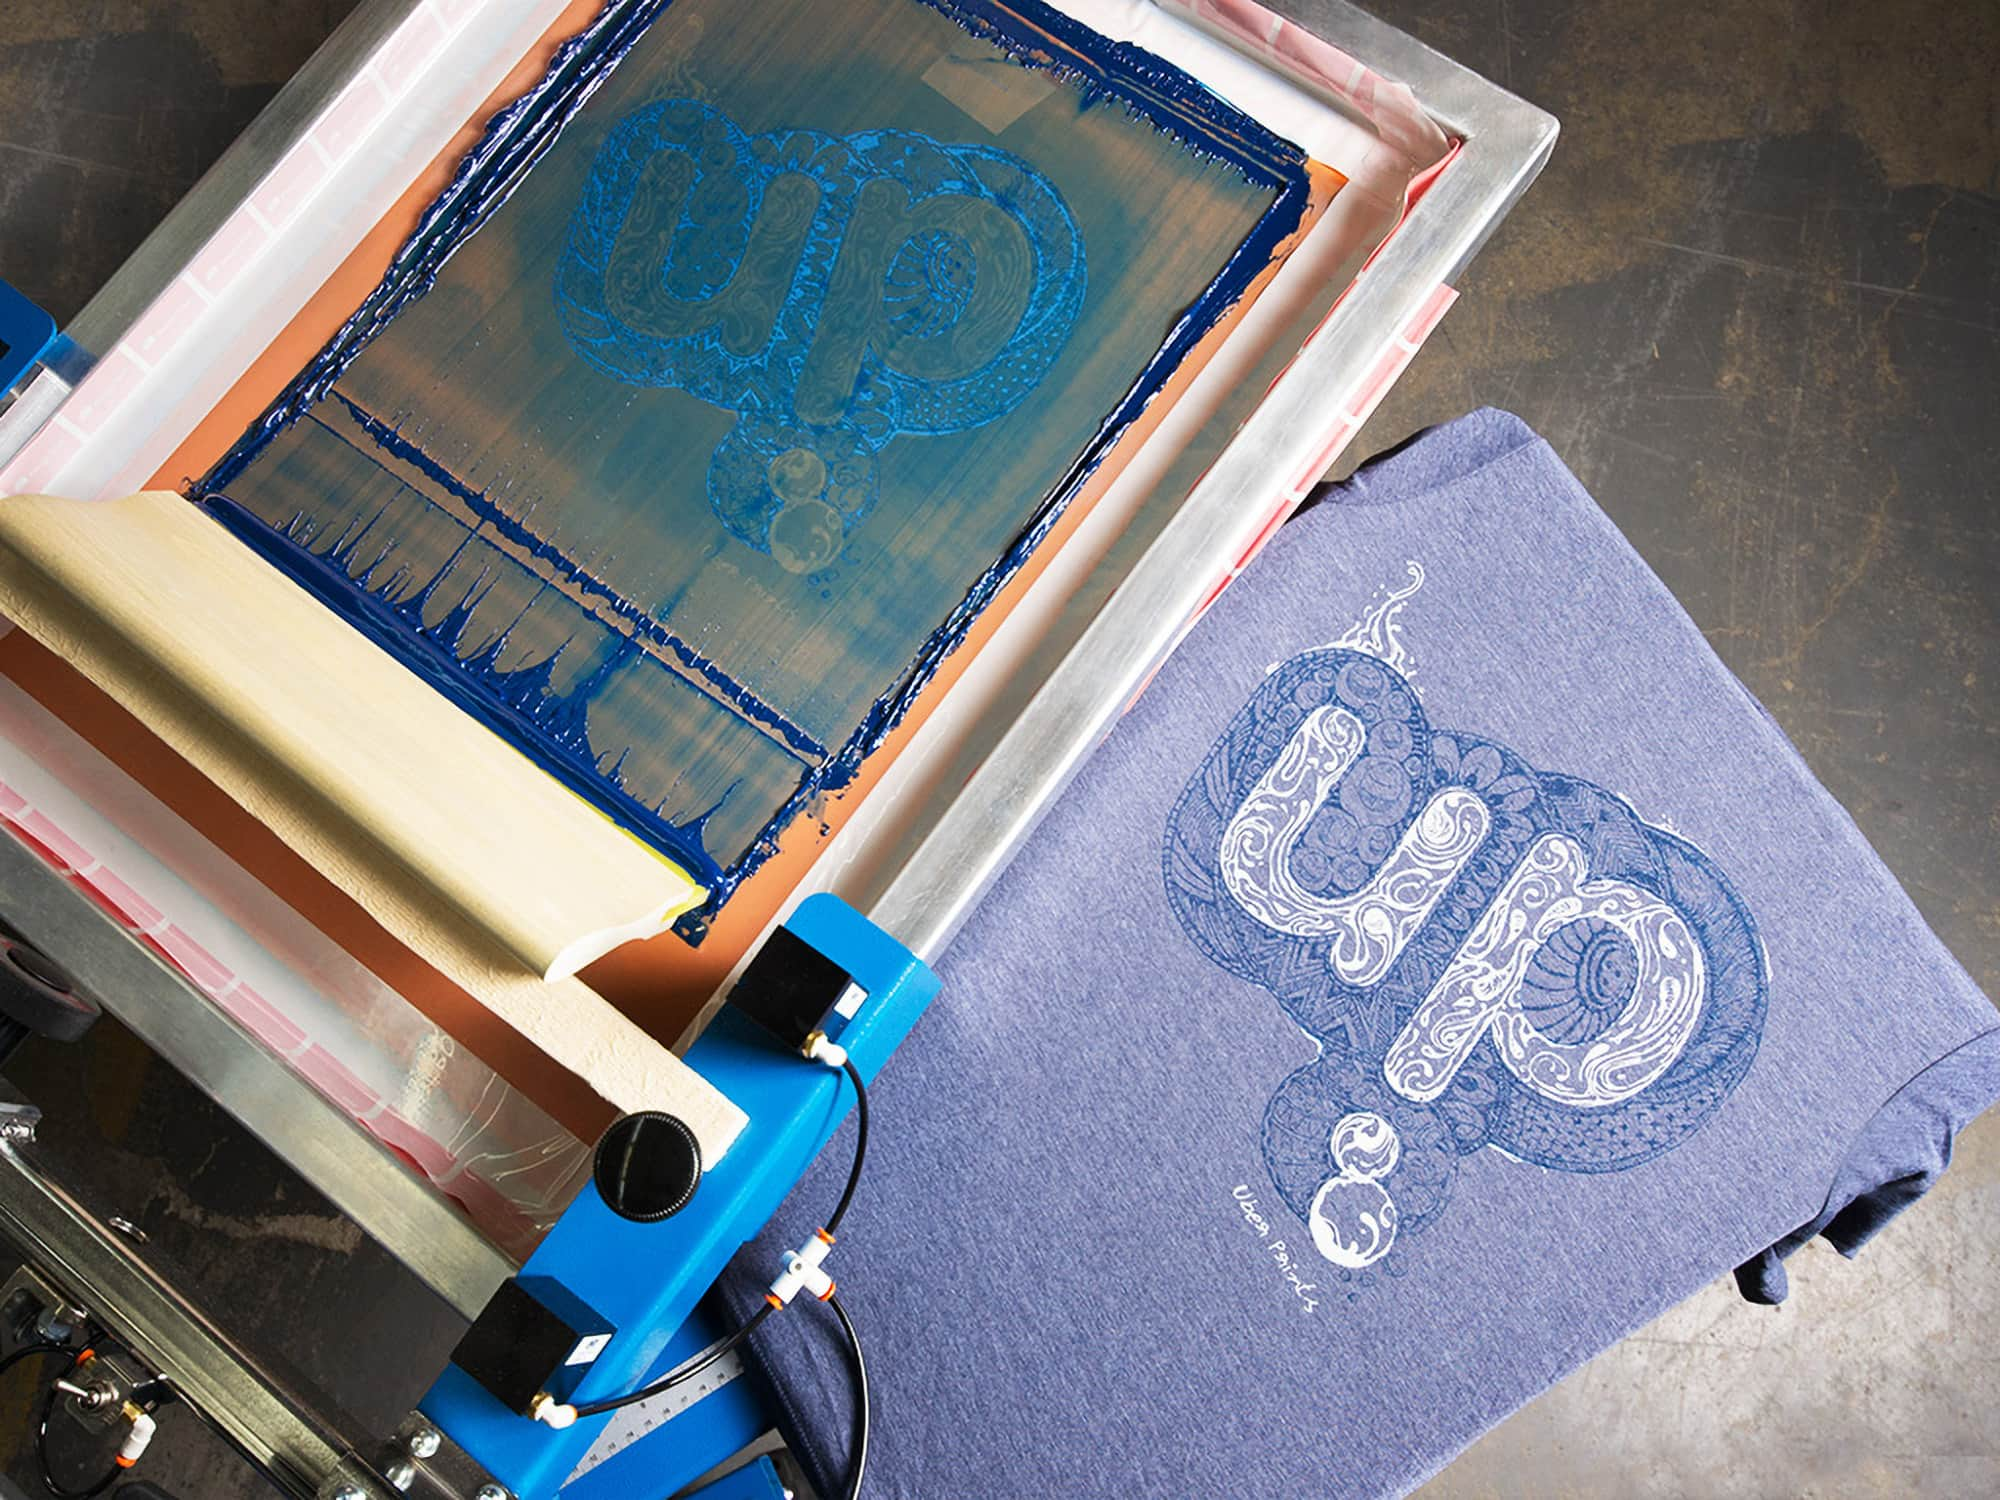
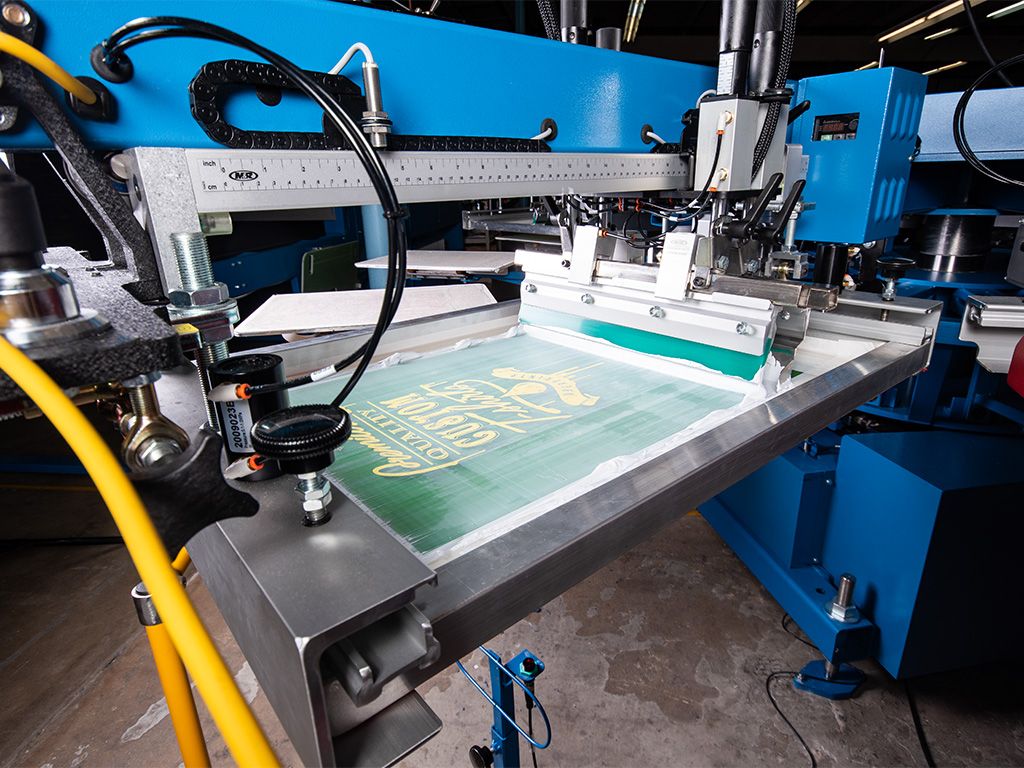
Printing
This is where the magic happens and we see all our preparation transform into vibrant, custom screen printed designs. To get a better idea of the printing process, let’s first look at how presses function.
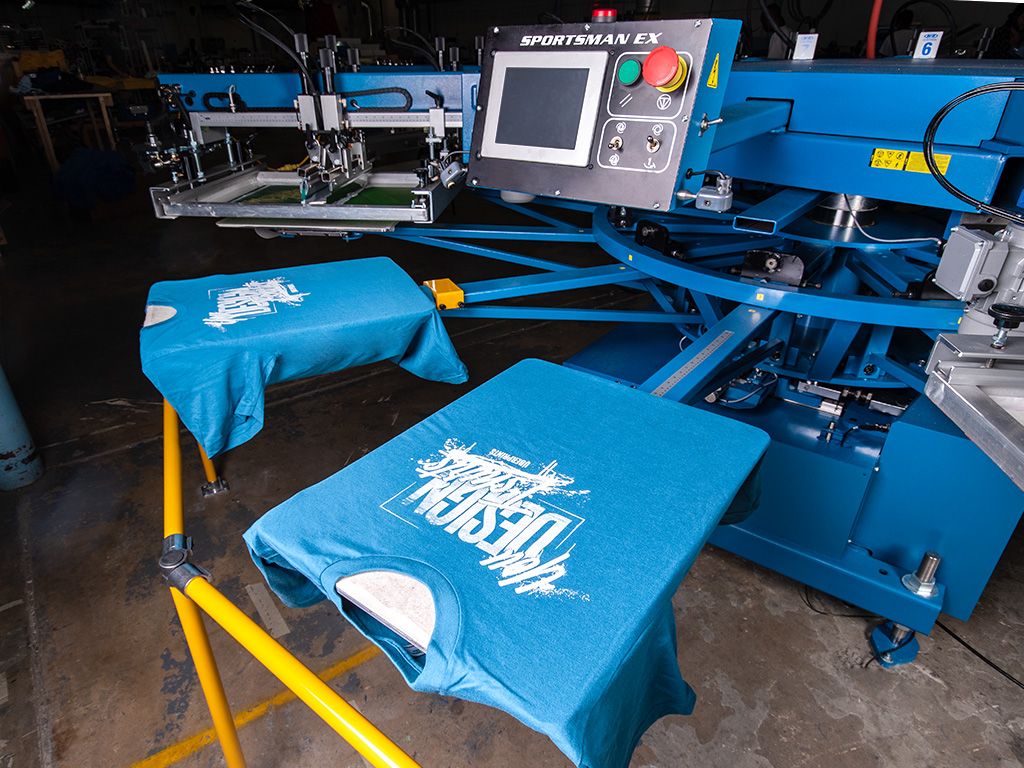
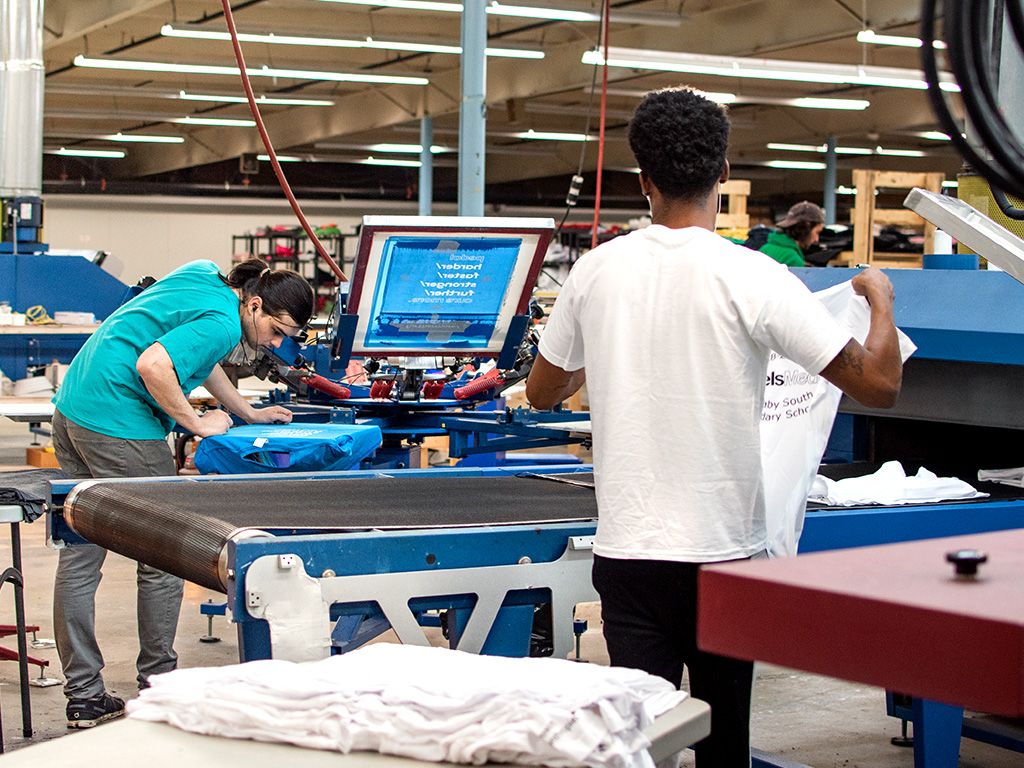
Screen printing presses are either manual, where an operator physically pulls the squeegee, or automatic, where we support the press while it does the physical work. Arranged like a spinning circle, these presses have arms that extend out from the center to hold each t-shirt, along with a parallel arm that holds each screen and squeegee. After a shirt is loaded onto the first arm, it spins one station over, lifts up to meet the first screen, and a squeegee is pulled across to push the first color through the stencil and onto the shirt. It continues to rotate, stopping at each screen, until it’s circled the whole press before being pulled off and placed on the dryer.
Setup
Before finished t-shirts can start flying off the press, we’ve got a few things to take care of to get us started. We’ll need to load each screen, add squeegees and ink, and get everything aligned and ready for full-blown production.
Setting up to print starts with these 3 concepts:
- Underbasing – Depending on the ink and apparel color, we may need to start by printing a white underbase. As the very first screen printed, it lays down an initial layer of ink to provide a good primer for vibrant colors to show up on dark fabric. Whether or not this is necessary is usually planned during the artwork preparation phase.
- Print order – After a possible underbase, the order colors are printed ultimately relies on assessing what achieves the best looking print. While there is a recommended print order established in artwork preparation, there are a number of ways of prioritizing colors, such as: light-to-dark, small-to-large, or least-to-most important.
- Registration – Each screen needs to be accurately aligned with one another using a number of test prints to get this just right. The small bullseyes mentioned earlier and an overall assessment of the design lets us fine tune alignment using adjusting knobs on the press.
Printing
Now that the design has been test printed and our final product checks out, we can get down to business printing the actual order. Things can start to move quickly, with automatic presses routinely printing 300–700 t-shirts per hour, so a small team of people helps keep everything moving along.
These are the 3 primary jobs to keep a press running smoothly:
- Loader – Each and every t-shirt is threaded onto the arm of the press and placed in the proper location. The loader sets the pace for the rest of the team, making sure each print is straight and consistent.
- Puller – At the end of the press’s rotation, a second team member removes each completed t-shirt from the press and places it on a dryer belt to cure the ink.
- Catcher – On the opposite end of the dryer belt, a third person collects completed t-shirts, checking for defects, printing issues, and ensures consistent print quality.
Curing
An easily overlooked part of the process, the belt dryer is important for durable, long-lasting prints. These gas or electric powered ovens have long conveyor belts running from one end to the other to carry wet prints through to completion.
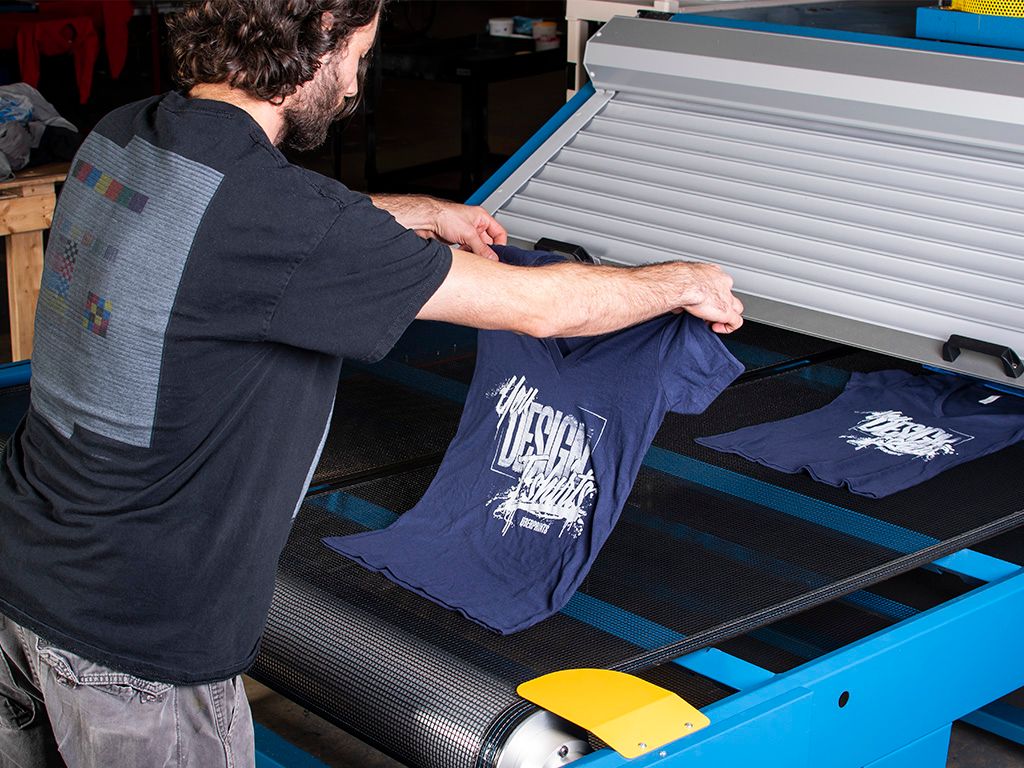
Here are the two concerns when sending finished prints through the dryer:
- Curing ink – This seems obvious, but different inks are manufactured to cure at different temperatures. Not to mention, depending on the amount of ink and type of apparel, it can take more or less time to completely cure. Temperature probes are often sent through the dryer to measure the actual ink temperature on the t-shirt.
- Dye migration – If the fabric makeup includes polyester, it’s also important to ensure the t-shirt doesn’t get too hot as well. As polyester is heated above 300°F, dye migration begins to occur where the dye from the fabric evaporates up and into the print, possibly discoloring the ink.
Clean-up
Once the order has been wrapped up and everything has been successfully printed, there’s still quite a bit of work to get everything ready to start the process over again. This additional work is one more reason why printers place minimum order requirements on screen printed orders.

The 2 essential tasks to get us ready to begin the next order are:
- Screen reclaiming – Specialized solvents are used to remove the ink that’s left behind and break down the hardened emulsion. With some elbow grease and a good spray from a pressure washer, screens are once again ready for a new coat of emulsion.
- Squeegees and utensils – Squeegees, spatulas and others tools are thoroughly cleaned and prepared for the next print run.
Bringing it all together
From artwork preparation to clean-up, each step of the screen printing process can seem intensively detailed. And it’s this work that makes a minimum order requirement necessary for the process. However, if your order calls for it, the upside to screen printing is that it can offer some serious cost savings and flexibility that continues to make it a great option.
Some advantages to screen printing
- Cost effective for large quantities – Despite the lengthy set up, screen printing presses can run so fast that we can offer discounts for larger quantities. The more you order, the cheaper each t-shirt will be.
- More apparel options – The versatility and tools in screen printing means that we can offer more apparel options. Whether it’s cotton, polyester, dark, or light, we can make any style and fabric work.
- Color matching – Preparing each and every color for a design may be extra work, but it allows us to match specific colors when it matters. With the right inks, we can print even the most eye-popping designs.
If even after reading this far, you’ve still managed to have questions about what screen printing means for your order, feel free to contact us and we’d love to talk about it!